Trying to straighten the frame
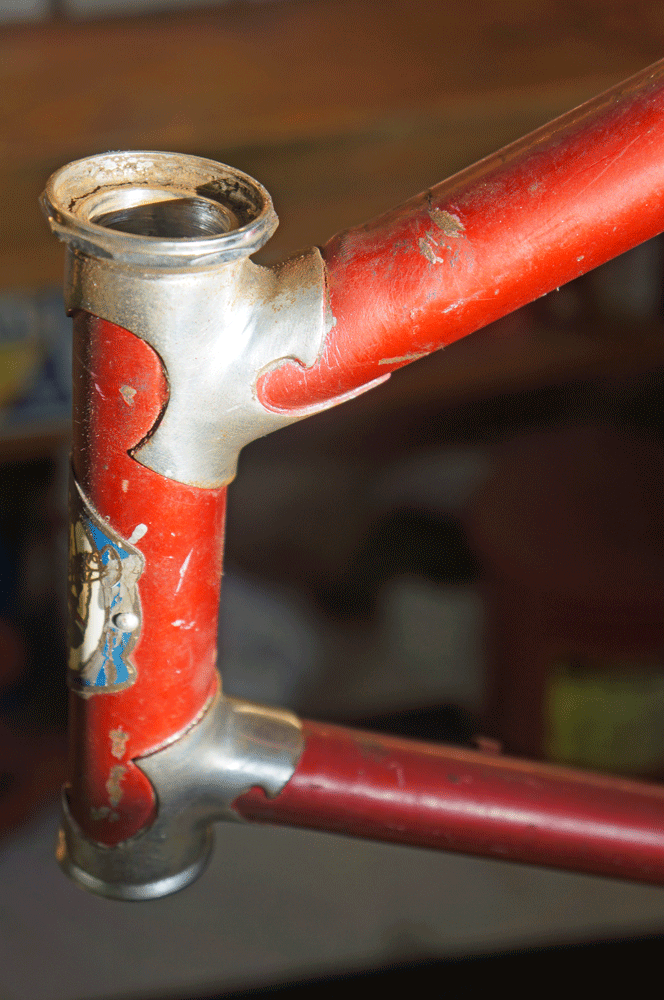
This is the problem that I am going to try and fix. The frame is upside down in the work stand and so the down tube shows as the upper in the picture. There is clearly some deformation visible on the underside of the down tube. The top tube is also damaged in the similar location but is not quite so severe.
These are the tools (below) that I will use to try and repair the frame damage. They include a head tube repair jack (HTS-1), a frame bending lever and dropout alignment tools, all from Park. I also have some frame blocks from Paragon Machine works in 1″ and 1-1/8″diameters to match the tube sizes. These will be used to reform the tubes back into a more round shape.

The plan is try and force the head tube back into it’s original position by using enough pressure to re-align it. At the same time, the frame blocks will be pressed over over the damaged tubes to force them back to a round shape. The frame bending lever will mainly be used on the forks to tweak them back into correct, and the dropout alignment tools will be used to ensure that the dropouts, both front and rear, have parallel faces. It all sounds pretty easy, right?
The first step is to put the jacking screw into place. It is wedged against the bottom bracket and the lever arm is inserted thru the head tube. The stops on the lever arm hold it in place during the set up. I chose to leave the bottom bracket and headset cups in place to reinforce those stress points when force is applied.
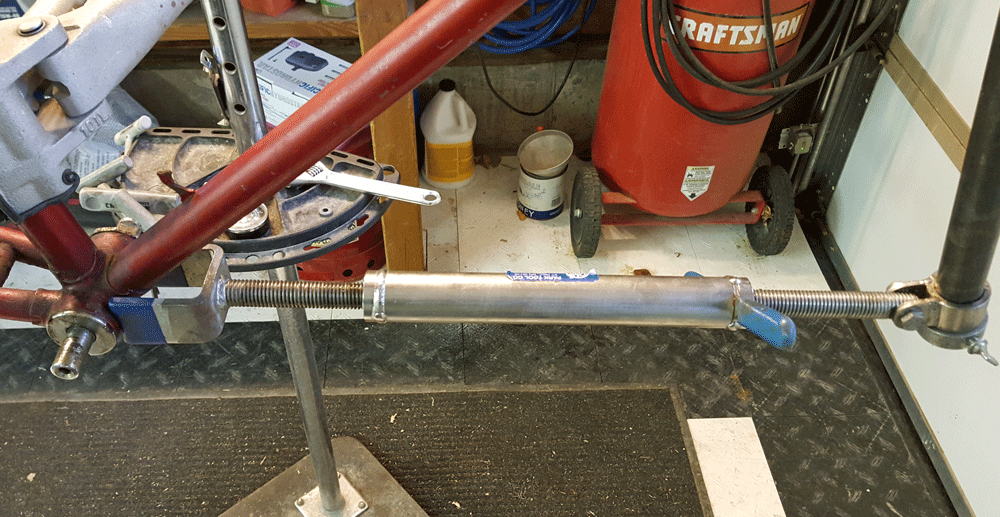
Next, I will clamp some frame blocks over the bent sections of the tubes. They are sized to match the exact outside tubing diameter of this frame. These need to heavily greased to help the frame block slide over the tubes as they are clamped down.
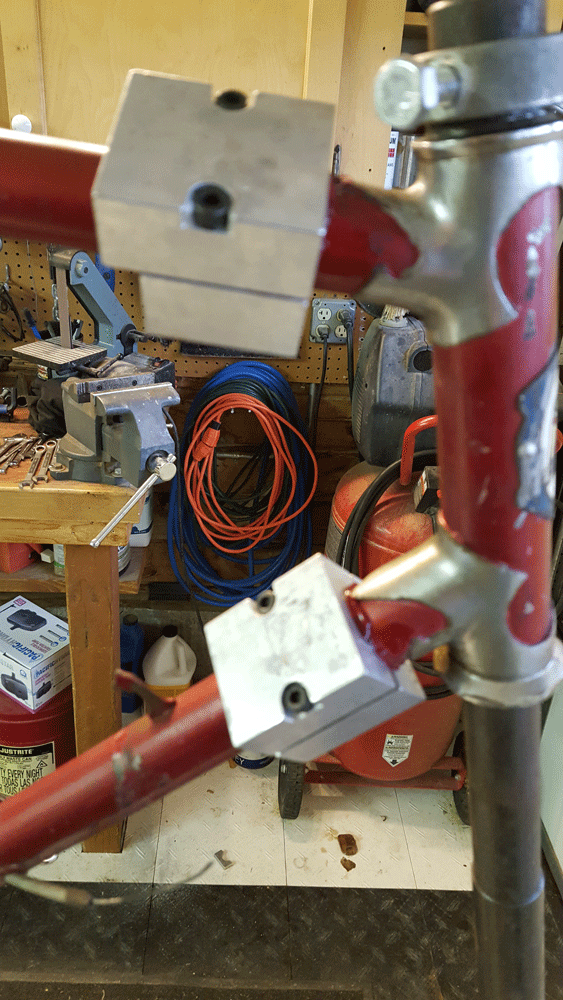
The idea is that as the frame is jacked back into it’s original alignment, the frame blocks are tightened to help reform the tubes at the point where they were deformed. Neither tool alone would do the job properly, but together perhaps they will be effective.
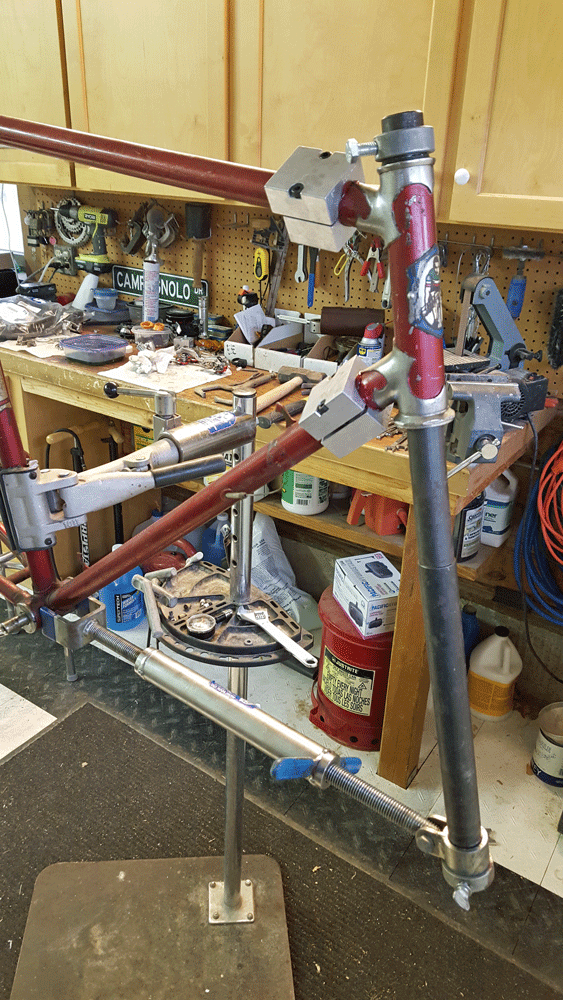
I applied pressure on the jack and then tightened the blocks, alternating this procedure repeatedly. Applying too much pressure could be catastrophic so I proceeded in small measures. After several cycles of pressure and then relaxing, I took off the frame blocks to examine the deformed areas. I assumed that I would have to over-bend and then relax the pressure to get proper alignment. When I removed the frame blocks it looked really good. However, when I put a straight-edge along the tube I saw that the tube was not straight. It had been corrected beyond its original alignment.
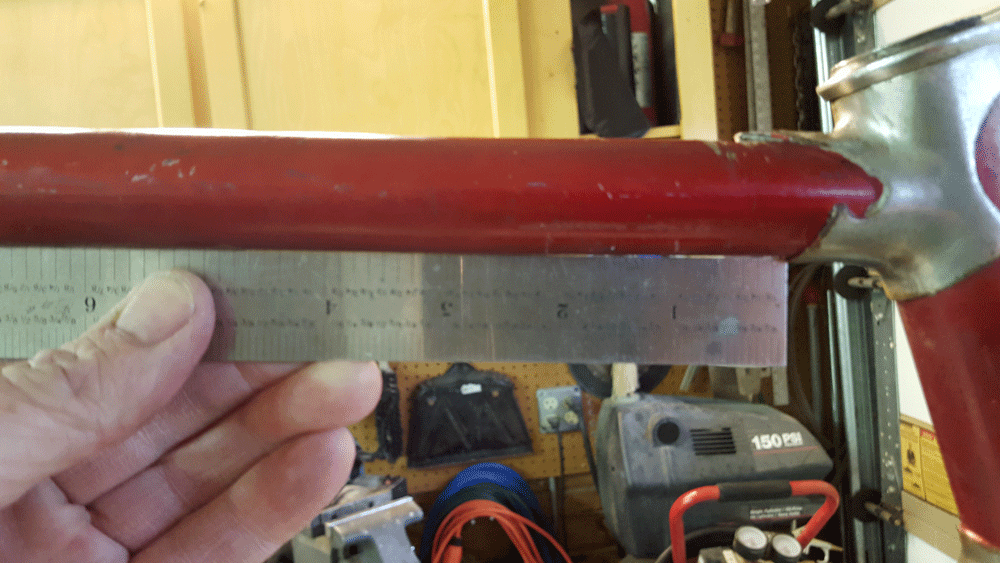
I was unhappy at first, but after thinking about it I realized that there was probably still some deformation remaining in the lug joint. My rational is that a slight over-bend of the tube should compensate for the remaining deformation in the lug. It is very hard to measure the remaining alignment issues in the tube vs. the lug but the visible gap in the tubing vs. the straightedge is only a couple of thousandth’s of an inch, and any angular difference is a small fraction of a degree, perhaps 1/10th of a degree or so. I think that I can live with that!

This is the same down tube shown in the first photo in this set. Please note is that the frame is now oriented in its upright position so that you can reference the direction of the current misalignment. I’m thinking that it looks pretty good by comparison.
Next up will be the remaining preparation and preservation of the frame before any building begins.

January 30, 2016 at 1:50 am
That is some delicate and slightly stressful work! It’s like watching a surgery take place.
One question. Did you purchase the head tube repair jack, the frame bending lever and/or the dropout alignment tools specifically for this project? I have the dropout tools at my shop but the others are extremely specialized and not something I could see using very often.
January 30, 2016 at 10:00 am
Josh, I did buy some of these tools (frame jack and blocks) just for this project. I already had the others. I justified it by knowing that I will resell the frame jack after I am done with it. I got the frame for a song and the parts on it were where the value was. If I destroyed the frame in the experiment I would still be fine. If it came out alright, so much the better. Now I know a little more of what can be achieved with these things.
January 30, 2016 at 12:20 pm
I have a Schwinn Voyageur that was my cherished regular commuter for years. After an auto struck me from the side, I permanently hung the frame on my shop wall as a tribute. Double checking, I see my frame tubing is bent, similar to yours, but since it was a side impact, the bend angles the tubes to the right rather than forward or downward like a front impact (like yours). Sadly, I don’t think the frame jack you have would help my frame. Only a torch and a frame builders experienced hand would likely be useful but even then, I just don’t think it’ll ever be as solid and true as it once was.
Either way, I’m watching your restoration with keen interest!